T-shirt mockups from a real tee: flat lay to on-model without a template
How to turn one flat-lay photo of a real t-shirt into on-model, lifestyle and packshot images, which channel needs which version (Amazon requires adult apparel on a standing model), and what to check before publishing.
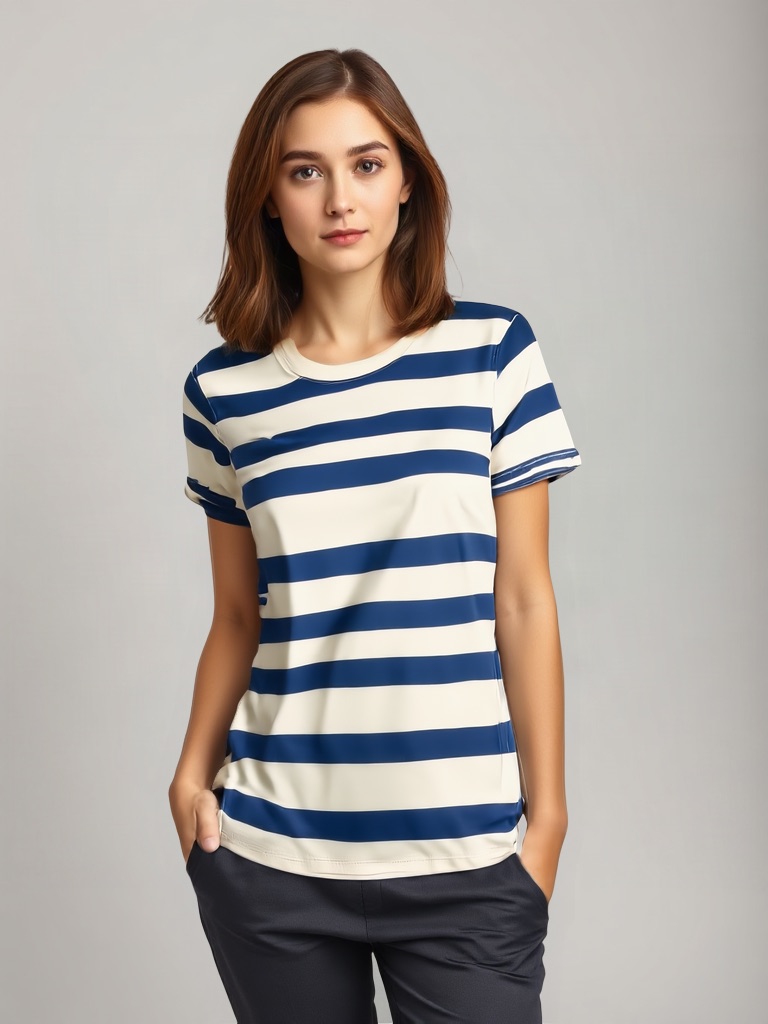
If you have one good photo of a real t-shirt, you can turn it into several listing-ready images without reshooting the garment on a person or booking a studio. This page walks through what that source photo needs, what variants you can realistically produce from it, which channel needs which version, and what to check before anything goes live.
Key takeaways
- The flat lay is the master file. Square-on, sharp, evenly lit, wrinkle-free around the print; everything generated from it inherits its faults.
- Amazon is the hard constraint: adult apparel must be on a standing model for the main image, mannequins of any kind are banned, and the background must be pure white. A flat lay cannot be the main image.
- Etsy, Shopify and TikTok Shop accept flat lays as product images; TikTok wants the main image front-on on pure white and bans digital renderings as the main image.
- A photo-based mockup keeps your garment pixels; a template mockup pastes your design onto a stock blank every other seller also uses.
- Check print position, text legibility, neckline, hem and colour against the original before publishing; those are what drift.
What a flat-lay photo needs before it can become anything else
Angle, light and surface
Shoot the tee directly from above, not at an angle. An angled phone shot turns a square graphic into a trapezoid, and that distortion carries into every on-model or lifestyle version. Lay the shirt on a plain, neutral surface near window light so the fabric colour reads accurately; heather greys and off-whites are the shades most likely to shift. Use the sharpest, highest-resolution file you have. If the design came from a print-on-demand supplier, export the largest front-view file, not a thumbnail, so small print text keeps enough pixels to stay legible after it is placed on a model.
Wrinkles, collars and hoods
Smooth the fabric by hand before you shoot, especially under and around the print; a wrinkle through a logo breaks it into pieces that no later step repairs. Flatten the collar so its shape and rib width are visible: a crew, V, scoop or mock neck needs to read as what it is, because that detail carries into every variant. For hoodies, do not rely on a flat lay: a flattened hood is easily read as a collar by try-on engines, so photograph hoodies on a hanger or a ghost mannequin instead.
When you need the back
If any part of the design is on the back, shoot the back the same way. A front flat lay contains no information about a back print, so nothing generated from it can show one.
Turning one flat lay into on-model, lifestyle and packshot images
A photo-based workflow keeps the print and fabric from your photo intact and transfers them onto a model or into a scene; the print is not redrawn, which is why a clean flat lay matters so much.
Three on-model framings from one flat lay
- Waist-up: shows the chest print clearly; usually the first image in a collection grid.
- Full-body: head to knee, the frame that demonstrates fit (cropped, regular, oversized).
- Close crop: a tight zoom on the print or knit so shoppers can read small type.
Lifestyle versus packshot. Lifestyle images put the tee in a casual setting, often in a vertical crop for social and Stories; they sell mood and sacrifice a little print clarity. Packshots show the garment alone on white, ivory or grey for marketplace grids where shoppers compare side by side. Use lifestyle for ads and social, packshots for catalogue and search thumbnails.
Matching each variant to the channel
Amazon. The main image must show the whole product once, filling 85% of the frame on a pure white background (RGB 255, 255, 255), with no text or badges. For adult-size apparel Amazon requires the garment on a model, standing (not sitting, kneeling or lying), and bans mannequins of any kind, including invisible, flesh-tone or hanger forms; accessories and multipacks are shot flat. Recommended at least six images plus a video, 1,000 px or more on the longest side for zoom. If a flat lay is your only photo, an on-model variant is the only route to a compliant main image. One more rule: photorealistic AI-generated people must be tagged contains-synthetic-performer in the file's XMP metadata before upload.
Etsy. Photos must represent the item accurately; flat lays are common and accepted. Etsy recommends at least 2,000 px on each side, warns that files over 1 MB may fail to upload, asks that the first photo be horizontal or square and the rest match, and crops thumbnails square, portrait and landscape, so centre the shirt.
Shopify. Image rules come from your theme, not a marketplace. Shopify accepts up to 5,000 × 5,000 px and 20 MB and says 2,048 × 2,048 px usually displays best for square product images; keep one aspect ratio per collection.
TikTok Shop. Up to nine square images of at least 600 × 600 px; the main image must be the front physical view on pure white with no added text, logos or borders, and digital renderings are not allowed as the main image. AI-generated images are allowed for the gallery when they accurately represent the real product; disclose significant AI use.
T-shirt mockups without a template
A template mockup takes a flat design file and lays it onto a pre-rendered blank, so the fabric, the body, the lighting and the drape are fixed by the template, and every seller using it shows the same stock body. A photo-based mockup starts from your own flat lay: upload the photo of the real tee, pick a model and a scene, and the output places your actual print and garment into the new frame. Scale, placement and fabric drape come from your photo.
For a catalogue with several designs or colourways, reuse the same model and pose across generations so the storefront looks like one shoot. PicBarn's t-shirt mockup tool works this way on a 12-persona library (4 credits for four candidates, 5 free credits on sign-up); the virtual try-on hub covers inputs that transfer well, and the AI product photography tool produces the pure-white packshot and the lifestyle scene from the same file.
Checking accuracy before you publish
- Print position and scale. Compare the graphic's position against the neckline in the original and the output; watch for a print that crept down, shrank or grew.
- Text legibility. Read every word at full size; small lettering is what blurs first.
- Neckline, sleeve and hem. A crew stays a crew; cap or short sleeves end where they do on the real garment; a crop top's hem lands where it should.
- Colour drift. Compare against a reference photo of the actual blank, not memory. Heather grey and off-white are the usual drifters.
- Fit across sizes. A print that looks a certain scale on one body looks different on another; if you sell a wide size range, generate on more than one body type rather than one model for all.
Weighing it against a shoot or a template
A studio shoot gives a real photograph with no fidelity questions but needs a model, a location and days of lead time. A template mockup is fast and cheap but identical to every competitor's. Photo-based generation sits between: no booking, your own garment, about a dollar per style, with the checks above as the quality gate. None of the three replaces trying the garment on: fit, fabric weight and seam finish can only be approximated by a picture.
FAQ
Can I use a flat-lay photo as my Amazon main image? Not for adult apparel. Amazon requires the garment worn by a standing model on pure white, with no mannequins or hangers. Generate an on-model variant from the flat lay and use the flat lay as a secondary image.
Do Etsy and Shopify require on-model photos? No. Etsy requires accurate photos and recommends 2,000 px or more; Shopify leaves it to your theme and recommends 2,048 × 2,048 for square images.
What if the design is on the back? Shoot the back as a separate flat lay; nothing can be generated from a front-only photo.
Why is the print slightly off in the generated image? Position, scale or colour drifted in generation. Compare against the original, read the text at full size, and run again from the original upload; candidates you do not keep cost nothing.
Sources
- Amazon Seller Central, Product image requirements: main image, 85%, pure white, standing-model rule for adult apparel, no mannequins, AI-people tag.
- Etsy Help, Listing photos: 2,000 px, 1 MB, first-photo shape.
- Shopify Help, Product media types: 5,000 × 5,000 px, 20 MB, 2,048 × 2,048.
- TikTok Shop Seller University, Product listing policy and AI-generated content for listing images.